How The Last Taxi Works
The taxi puzzles matter because clearing all seven Thresholds progresses The Last Taxi side story and reveals more of Mila’s predicament. The cabs are easy to overlook in Manhattan, but their persistent horns and flashing lights make them identifiable once you enter the right area.
Approach a driverless taxi, enter through its open passenger door, and you will be transported into a Threshold: a distorted version of the city. Follow the alleyway to the ringing payphone and answer it before attempting the puzzle. Each Threshold contains three rounds, and every correct taxi selection moves Dylan to the next group.
The basic rule is simple: locate the element that breaks the pattern. That difference may involve a vehicle light, a streetlamp, a sound cue, a shadow, or a repair part. A wrong choice resets the current sequence, but it does not lock you out of the quest.
Use these habits in every Threshold:
- Watch several full light cycles before choosing; timing is often the real clue.
- Check all nearby taxis during rounds affected by proximity.
- Answer the payphone first, since it starts the puzzle and advances Mila’s dialogue.
- Listen for horns while searching each zone.
- Return later if a taxi is behind an ability gate or story-progress barrier.
| Step | What to do | Why it matters |
|---|---|---|
| Find the taxi | Follow its horn, flashing lights, and nearby landmarks | Opens the Threshold entrance |
| Take the call | Use the payphone in the Threshold alley | Starts the three-round puzzle |
| Find the outlier | Compare taxis, lamps, shadows, or parts | Clears a single round |
| Complete three rounds | Choose correctly three times | Escapes that Threshold |
All Seven Taxi Locations
There is one taxi in each major area: Central, Downtown, Evacuation Zone, West Incursion Zone, The Park, Underpass, and Unknown. You can complete accessible taxis in any order, although several require abilities or later-story access.
| Zone | Taxi location | Access requirement |
|---|---|---|
| Central | Northwestern alleys near the Patterned Factory and Field Office | No special ability required |
| Downtown | Northern traffic jam in the Deserted Area | Reach is required |
| Evacuation Zone | Hazardous alley near the Evac Building and Sinkhole routes | Navigate spikes and lasers |
| West Incursion Zone | Near Empire Avenue Station and the theater district | Shift is required |
| The Park | Parking garage level below the rooftop vendor area | Reach the roof, then descend |
| Underpass | Platform near the Research Site and recurring camp | Later Underpass progression |
| Unknown | Rear section of the story-only Unknown zone | Reached through main progression |
Central is an excellent early stop. From the Field Office side, work toward the Patterned Factory district and search the northwestern streets. A parked truck provides a useful landmark: the taxi waits down the nearby alley rather than directly on the main road.
Downtown’s cab is in the northern end of the Deserted Area, surrounded by abandoned traffic. You must first unlock Reach through the Evacuation Zone to cross into eastern Downtown. Once you reach that isolated section, continue north until you find the large traffic jam.
The Evacuation Zone taxi sits at the end of an alley filled with Hiss hazards. Search between the routes leading toward the Evac Building, Sinkhole, and unauthorized mines. Spikes and lasers block the direct line, but the taxi’s flashing lights confirm that you are heading correctly.
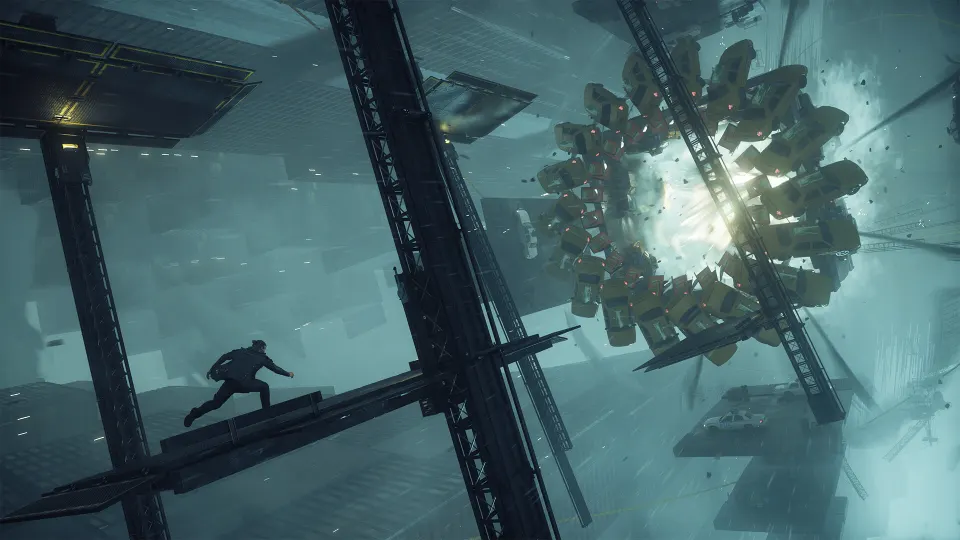
West Incursion Zone is more complicated because its vertical, gravity-shifted routes distort your sense of direction. Use Shift to traverse the rooftops and reach the taxi near Empire Avenue Station. If the horn sounds like it is coming from above or below, trust it; the altered geometry is the reason.
In The Park, climb the mold-covered exterior wall to the parking garage roof. The vendor area marks the correct upper level. Drop through the opening in the mold to the level below, then follow the garage route around to the waiting taxi.
The Underpass and Unknown taxis are best collected during normal campaign progression. The Underpass cab becomes reachable near the Research Site after crossing the relevant chasm. The Unknown taxi is in a story-only space and cannot be reached through ordinary map exploration.
Taxi Puzzle Solutions
A Control Resonant taxi puzzle is based on observation rather than fixed taxi positions. The puzzle type can vary between visits, so identify the active pattern instead of relying on a guide that says “left” or “right.” After a failed attempt, look again because the arrangement may change.
| Puzzle area | Round one | Round two | Round three |
|---|---|---|---|
| Central | Taxi with active lights or engine | Taxi with roof sign lit | Taxi combining the earlier active traits |
| Downtown | Taxi with roof sign lit | Sign stays on as you approach | Another taxi activates the correct cab |
| Evacuation Zone | Taxi flashing off-beat | Taxi flashing twice | Taxi that never lights up |
| West Incursion Zone | Taxi beneath flashing lamp | Taxi beneath non-flashing lamp | Lamp flashing opposite the group |
| Underpass | Taxi lit while lamps go dark | Taxi dark while lamps light | Taxi reacting opposite the others |
| Unknown | Inspect shadows using the lamp | Find the mismatched silhouette | Repeat the shadow comparison |
Central teaches the visual logic used in several Thresholds. In the first round, identify the only taxi with an active feature, such as headlights, taillights, engine noise, or an illuminated roof sign. The final round usually combines traits that were separated among different cars earlier.
Downtown uses proximity. Walk near each taxi rather than studying them from one distant spot. In one round, the right cab keeps its roof light on while nearby taxis change state. In another, approaching a particular vehicle causes a different taxi to illuminate; enter the taxi that responds.
Evacuation Zone is about rhythm. Watch the group for multiple cycles before moving. The solution is the taxi that flashes out of time, flashes twice while the others flash once, or remains dark when every other cab lights up.
West Incursion Zone and Underpass direct your attention upward. The taxis may appear identical, while the streetlights above them reveal the solution. Compare whether each lamp is flashing, dark, synchronized, or operating at an opposite interval.
Unknown replaces blinking signals with silhouettes. Carry and reposition the movable lamp, then study how each object casts a shadow. Find the outline with an extra shape, a missing detail, or a form that does not match the repeating pattern.
Repairing the Taxi in The Park
The Park Threshold is different from the standard odd-one-out format. Instead of selecting from a lineup, you repair a damaged yellow taxi by destroying mold growths and attaching the appropriate components. Some parts are decoys, so match both color and placement.
| Repair round | Objective | Key detail |
|---|---|---|
| First | Clear mold to reveal a hood and rear cover | Install both matching pieces |
| Second | Gather wheels and a hood cover | Ignore the blue decoy; choose yellow |
| Final | Clear outer growths before the central mound | Use matching body panels, grille, sign, and rear parts |
For the first repair, destroy the pale mold growths surrounding the car until the hood and rear piece appear. Carry each item to its matching attachment point. The taxi is ready for the next stage only after both required components are installed.
The second round introduces explosive mold. Clear the dangerous growths before collecting parts, then focus on the taxi’s yellow paint scheme. The blue hood is deliberately placed to mislead you and should be left behind.
The final repair has the most pressure because the mold returns quickly. Destroy the three smaller growths connected to the main mass, then attack the central mound before the outer growths regenerate. Collect compatible yellow panels, the roof sign, grille, and rear components.
Do not try to fill every available attachment position with whatever you find first. If a piece appears incompatible, compare its color and shape to the damaged area on the taxi. The objective is a fully restored matching cab.
FAQ
How many taxis are in the control resonant taxi puzzle quest?
There are seven taxis: Central, Downtown, Evacuation Zone, West Incursion Zone, The Park, Underpass, and Unknown.
Do the taxis need to be completed in a certain order?
No. Complete available taxis in any order. Some are inaccessible until you unlock Reach, Shift, or later-story locations.
What happens if I enter the wrong taxi?
The current Threshold sequence resets. You can immediately try again, but recheck the pattern because taxi positions or behaviors may change.
Why can’t I find the Downtown taxi?
Downtown’s taxi is beyond the barrier to eastern Downtown. Unlock Reach through the Evacuation Zone, cross into the Deserted Area, and follow the northern road to the traffic jam.
Why can’t I find the West Incursion taxi?
The West Incursion taxi requires Shift and rooftop traversal near Empire Avenue Station. Its horn may sound displaced because the area’s gravity changes orientation.
Do I have to answer the payphone every time?
Yes. The payphone activates the current Threshold puzzle and continues Mila’s side-story dialogue.