How Weapons Work
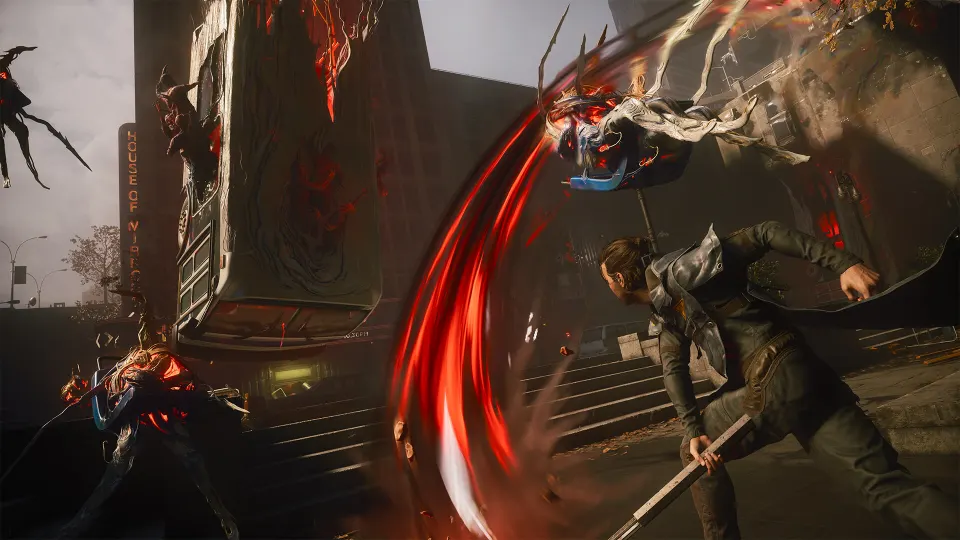
Control Resonant all weapons matter because Dylan’s Aberrant is the center of combat, replacing a conventional gun-first loadout with a transforming melee system. Your choices determine how quickly you build Falter, control crowds, apply status effects, and reach powerful finishers.
The Aberrant is split into three equipped categories: a Primary Form for standard attacks, a Secondary Form for heavier moves, and a Combo Finisher that extends a completed primary combo. Each category has a different job, so a strong build covers more than raw damage.
| Weapon category | Combat role | How it activates | Available forms |
|---|---|---|---|
| Primary Form | Light attacks and combo building | Primary attack input | Strike, Glaive, Cleave |
| Secondary Form | Heavy attacks, utility, and Falter | Secondary attack input | Crush, Drill, Extend |
| Combo Finisher | A powerful combo-ending move | Continue a completed primary combo | Six finishers |
You begin with limited choices during the prologue, but you are not locked into one approach for the full game. Additional forms can be unlocked through the Aberrant progression system, then equipped from the Loadout menu.
Weapon upgrades also raise Aberrant Strength. That stat improves Dylan’s baseline Damage and Falter, so buying upgrades is useful even when you are investing in a form you do not currently have equipped.

Primary Forms
Primary Forms set the tempo of every encounter. They are your most frequently used attacks and the route into Combo Finishers, making this category the foundation of a build.
| Primary Form | Shape and style | Best use | Key trade-off |
|---|---|---|---|
| Strike | Fast dual blades | Critical hits and single targets | Limited crowd coverage |
| Glaive | Broad scythe-like weapon | Groups, space control, and Power generation | Slower attacks and fewer crit opportunities |
| Cleave | Axe-like balanced weapon | Lift, back attacks, and Falter setups | Less specialized than the other two |
Strike is the fastest option. Its rapid hits make it easier to reach a finisher quickly, while its critical-hit focus rewards aggressive dodging and close positioning. Choose Strike if you enjoy chasing down priority targets or want a build that strengthens finishers and combat abilities through frequent attacks.
Glaive swings through a much wider area. It is especially comfortable when minor enemies surround Dylan, since each attack can damage several targets and create breathing room. Its strong Power generation also suits players who want to cast combat abilities often. Glaive is a dependable first pick for encounters that feel crowded.
Cleave occupies the middle ground. It deals bonus damage from behind and has useful Lift interactions, including an early dodge attack that can send enemies airborne. Lifted enemies cannot fight back briefly, and Cleave upgrades can further reward attacking airborne or Faltered targets.
Use the form that solves your biggest problem:
- Pick Strike when bosses or durable single enemies are slowing you down.
- Pick Glaive when mobs are interrupting your combos or boxing you in.
- Pick Cleave when you prefer positional attacks, crowd interruption, and a flexible middle path.
Secondary Forms
Secondary Forms are heavier attacks with more specific utility. They are not usually your constant damage tool, but a well-timed secondary attack can stagger an enemy, crack defenses, create range, or prepare a target for abilities.
| Secondary Form | Damage profile | Main utility | Strong matchup |
|---|---|---|---|
| Crush | Blunt | High Falter, armor breaking, Lift upgrades | Armored or airborne enemies |
| Drill | Sharp | Sustained contact damage and Weaken | Bosses and sturdy targets |
| Extend | Raw | Broad reach, cone coverage, timed charge bonus | Nearby groups and safer spacing |
Crush turns the Aberrant into a massive hammer. Its charge attack delivers the highest Falter potential among the secondary forms, making it the natural choice for stagger-oriented builds. It can also break armor and interact with certain metal doors during exploration. If you want to force openings against heavy enemies, Crush is hard to replace.
Drill attacks in a straight line and can continue damaging a target after the initial hit. Its standout feature is Weaken, which makes enemies take more Damage and Falter from combat abilities. Drill has less crowd-control value than the other options, but it becomes more valuable as your ability collection grows and boss fights become longer.
Extend gives Dylan a sectional staff or whip-like attack with useful range. It can strike several enemies in a forward cone, and its charged attack rewards precise timing with extra damage and Falter. Extend is an excellent complement to Strike, whose quick attacks are powerful but narrow.
Secondary upgrades can substantially change their utility. Crush can gain a Lift effect, Extend can earn a full-circle swing, and Drill can gain greater reach. Eventually, all three can unlock a switch attack, adding a special move when you use their input outside the usual finisher flow.

Combo Finishers and Loadout Builds
Combo Finishers unlock after reaching 15 Aberrant Strength. To trigger one, complete a primary attack sequence and continue pressing the primary attack button. They are the payoff for staying on offense, so match your finisher to what your Primary Form does well.
| Combo Finisher | General focus | Useful pairing |
|---|---|---|
| Concussive Beatdown | Fast Falter buildup | Strike or Cleave with Crush |
| Uppercut Surge | Lift and Power recovery | Cleave airborne setups |
| Wide Edge | Burst damage and area coverage | Glaive crowd control |
| Spin Edge | Wide repeated hits and Power recovery | Glaive ability-focused builds |
| Spin Pivot | Critical-hit, Weaken, or Burn synergy | Strike or Drill status builds |
| Spin Orbit | Rotational pressure and close-range coverage | Flexible crowd-control setups |
Concussive Beatdown is a practical answer when an enemy needs to be staggered quickly. It trades broad coverage for concentrated Falter, which can reduce the need to rely on Crush for every stagger opportunity.
Spin Edge is particularly useful with Glaive because it extends the wide-hit playstyle and can restore substantial Power when multiple enemies are caught in the attack. More Power means more opportunities to use shields, projectiles, turrets, and other combat abilities.
Try these early build directions:
- Crowd control: Glaive, Crush, and Spin Edge. Use wide attacks to build Power, then hammer high-priority enemies into Falter.
- Boss pressure: Strike, Drill, and Concussive Beatdown. Stay close, exploit critical opportunities, apply Weaken, and cash in with rapid Falter.
- Lift and disruption: Cleave, Crush, and Uppercut Surge. Raise enemies, keep them from retaliating, and build around damage against airborne targets.
- Balanced range: Strike, Extend, and Wide Edge. Strike handles priority targets while Extend and Wide Edge compensate for its tight attack range.
Do not treat rankings as permanent rules. Glaive may feel best in a crowded zone, while Drill can become the better answer for a boss with a large health pool. The ability to unlock and swap forms encourages adapting instead of forcing one loadout through every encounter.
FAQ
What are all weapons in Control Resonant?
Control Resonant all weapons are Aberrant Forms divided into three groups: Primary Forms (Strike, Glaive, and Cleave), Secondary Forms (Crush, Drill, and Extend), and six Combo Finishers: Concussive Beatdown, Uppercut Surge, Wide Edge, Spin Edge, Spin Pivot, and Spin Orbit.
Can you use every weapon at once?
You can unlock multiple forms, but equip one Primary Form, one Secondary Form, and one Combo Finisher at a time. Change equipped choices through the Loadout menu after unlocking them.
What is the best starting weapon?
Glaive is a forgiving early choice for groups because of its wide attacks and Power generation. Strike is stronger for fast critical-hit pressure, while Cleave is best for players who want Lift effects and positional damage.
Which Secondary Form should I choose first?
Crush is the simplest all-purpose recommendation because it builds heavy Falter and breaks armor. Choose Drill for sustained boss damage and Weaken, or Extend when you need reach and crowd coverage.
Do weapon upgrades affect unequipped forms?
Yes. Upgrades contribute to Aberrant Strength even if the upgraded form is not equipped. Increasing Aberrant Strength improves Dylan’s base Damage and Falter, making broader investment worthwhile.